How to install Boei in your Shopify store
You can install Boei effortlessly on your Shopify store, and you won't even need a developer.
Just grab a cup of coffee ☕️, and you can do the installation in 5-mins yourself.
Step 1. Create an account
Create a Boei account if you still need to get one. You can open it for free.
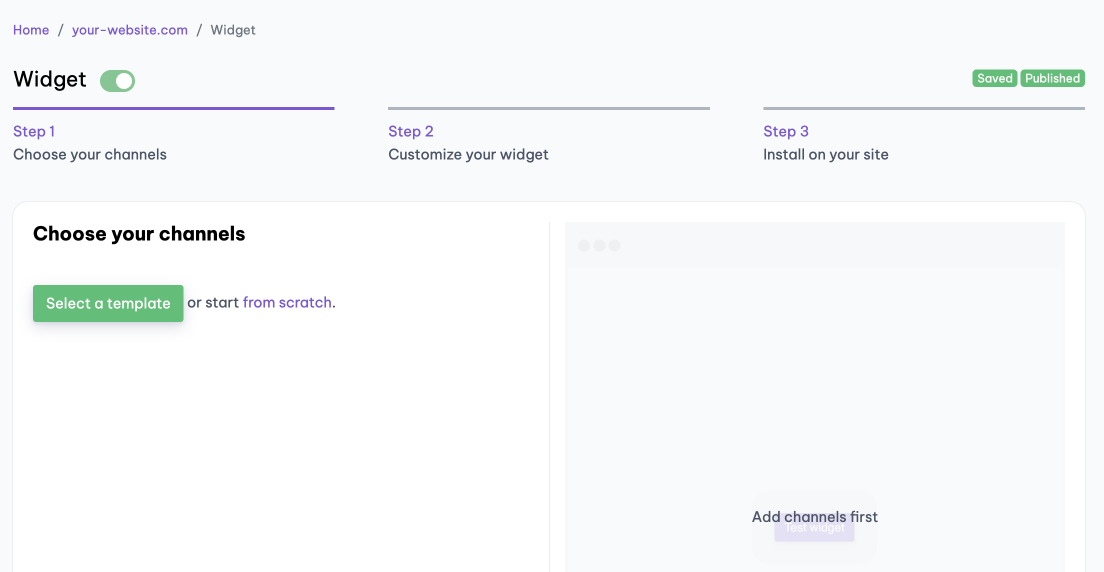
Step 2. Create a new widget
When you create a new account, you will immediately see the new widget that was created for you. (Otherwise, you must create a new widget.)
This is the widget screen that you are looking for:
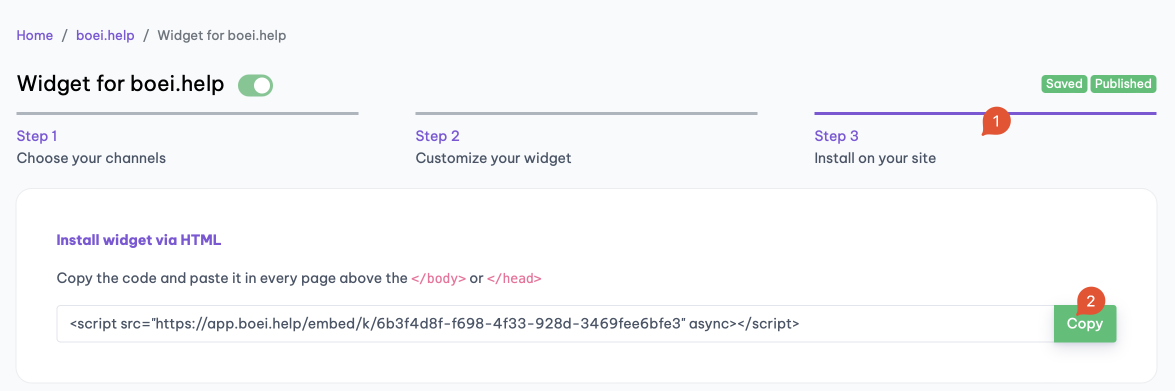
Step 3. Copy installation code
Click on "Step 3 Install on your site" and then click "copy" on the first box.
This code is linked to your domain in Boei. Each domain has its own code.
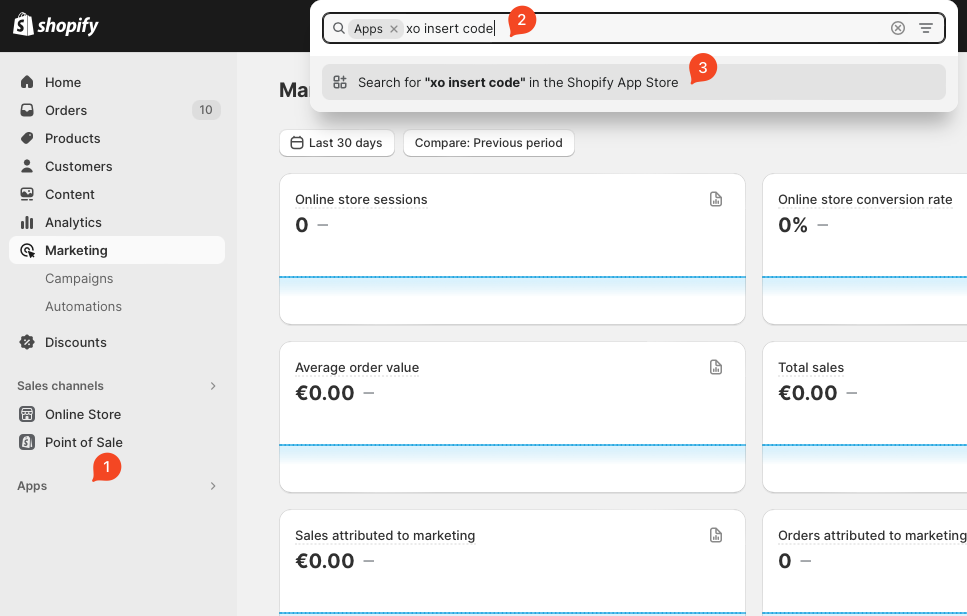
Step 4. Log in to Shopify
Open Shopify and click on "Apps" and search for "xo insert code".
We will use the plugin XO insert code to install Boei. It is a free and easy plugin.
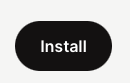
Step 5. Install the plugin

Press install.
Confirm installation in Shopify.

Step 6. Install the Boei code
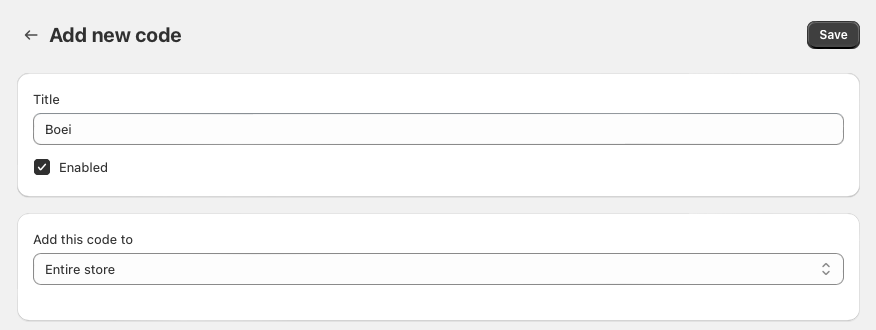
Click add new code

Name the code "Boei" and enable it on the entire store.
Place the script from step three in place of the "code in footer" textbox.
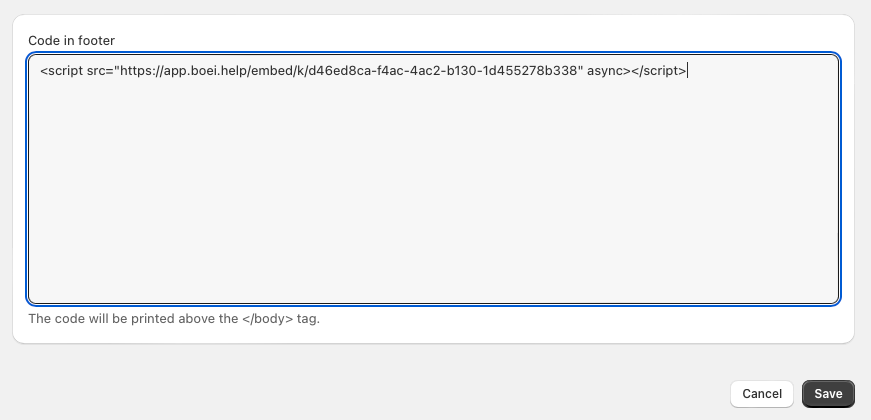
Press save.
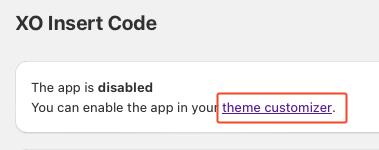
Step 7. Enable the plugin
Now, we enable the plugin by clicking the theme customizer link.
Enable the checkbox and press save.

Step 8. Finished coffee
Congrats, you are done! You now have the Boei live chat Shopify installed.
 Stripe Climate member
 from Utrecht